It isn’t exactly easy to integrate a website’s contact with Facebook but many people want to collect customer or visitor data via a contact form.
Fortunately, Response-o-matic has created an online tool that makes form creation and integration a snap. Here I will show you how to do this.
About
Response-o-matic has free and paid versions. The free version will allow you to create one form and doesn’t include too many extras. The free version also contains an ad. You may want to use the paid version if you have an issue with that. All accounts, however, have the form data stored on their server and is stored on their servers for 6 months. You will receive an email with each form submission but if you want to export the data to a csv file to import into a spreadsheet or database, you will have to upgrade to one of the paid versions.
What To Do
- Create an account
- You will be sent a confirmation email. Click on the link in the email to confirm the account.
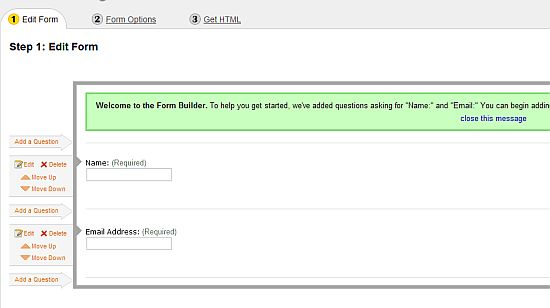
- You will immediately be taken to the form builder page.

- Start creating the fields you want to include in your form. The form starts you with name and email, which you can keep, delete or move to a new location in the form.
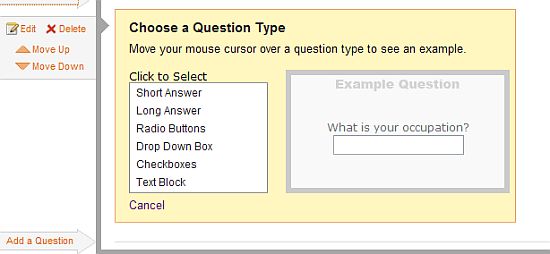
- Creating new fields is done on a question/answer model. For example, to create a new field click on the Ask a Question button and then select a question type. By question types they mean a text field, check boxes, radio buttons, etc.

In this example, I will create a drop down box for favorite types of videogames. - Set whether the field is required and save. Continue until you have created all of the fields that you want. You can always edit the form later, if you want to add or remove a field.
- Click the Save and Continue to Step 2 button.
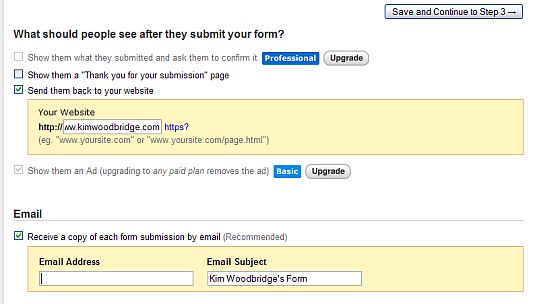
- In Step 2 you can set the Form Options. You can have a page that the user returns to after filling out the form. This can be back to the facebook wall, your website, or a thank you page that you have made on your server. A thank you page would probably be best but in this example I’m going to direct the users to my website.
- You can also set whether you want to receive an email when there is a new form submission.

- Click the Save and Continue to Step 3 button.
- On the next page you will have the block of code for your form that you can add to a custom tab on Facebook or to your website.
- You can see a quick example on the demo tab of my Facebook fan page.
- Of course, you will want to style the form to match the design on your custom fan page tab.
- Logging into your Response-o-matic account will show you the form submissions.
Do you think this is useful? I like the idea and it is easy to use but there do seem to be limits to the free version. For example, I would prefer to not have ads and I would like to export the user data. And if someone has a need for managing a lot of user data they are probably already using something like Aweber or Constant Contact, which already provides html code for forms that can be used on a custom Facebook fan page. If you wanted to add a quick and easy contact form, and didn’t mind dealing with the data manually and the ads this solution would just fine.
If you would like to hire me to assist in creating a contact form and styling it, please contact me.
photo credit: NASA Goddard Photo and Video


I think id definitely be turned off by having third party ads included in mine and most autoresponder services will either have a facebook form tutorial or likely walk you through the process of embedding their signup form into a fbml tab.
Hi Bryan – I think most people would want to opt for the paid version or
use a different solution. Still, this “free” solution is available.