Last year I wrote about how you can create a free contact form for your custom Facebook page using Response-o-matic. Now, I am going to explain how you can do something similar using North Social Contact, which can also be used as a form on your website and for a email campaign.
North Social has a number of Facebook applications, such as Sweepstakes, for running a contest. Other than North Contact, none of these applications are not free. You have a choice of pricing plans, which are the cost per month and have different levels of service. The monthly fee, however, gives you access to ALL of their applications for one Facebook page. If you need to use the apps for more than one page, each page will need it’s own separate account.
North Contact, however, is free.
Instructions
- Create an account.
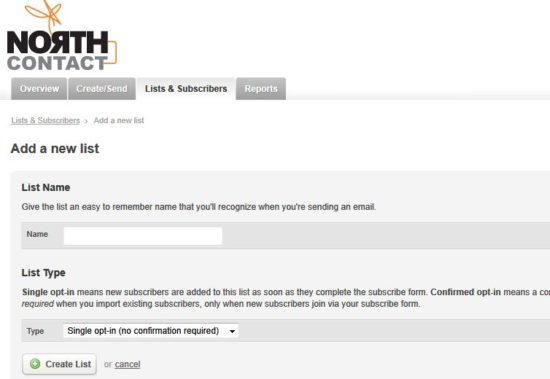
- Once logged in, click on the Lists and Subscribers tab and then click on the big link that says Create your first subscriber list.
- Give the list a name and then select the list type; Single Opt-in or Confirmed Opt-in. Click on the Next button.

- Click on the small link that says ‘Add a subscribe form to your site’.
- There will be two default fields; Name and Email. You can add more fields by clicking on the add more fields link. Keep in mind that the fields can not be reordered via this interface so you should add them in the order you would like them to appear. You can move them around in the code but the .csv export of the contacts will have the fields in this same order.
- Currently, when this contact form is used on a Facebook page, fields can not be set to required or optional. This can only be done when the form is used on a website. Here are the instruction for adding form validation and required fields. I have noticed, however, that if the email address is not filled out when submitting the form that the entry will not be added to the list of subscribers.
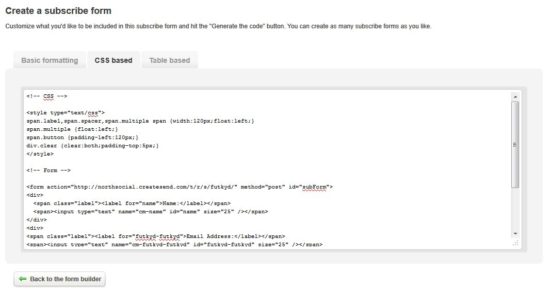
- Once you have created all of your fields, click on the ‘Generate the Code’ button.
- You will be given the choice of three different types of code to choose from; Basic Formatting, CSS Based and Table.

- Copy the code and paste it on the html or php page you have made for your Facebook iframe application.
- If you’ve added custom fields, you will need to go back to the main Lists and Subscribers screen, select the name of the list, and then click on the link on the right that says Create a Subscribe Form. I had some trouble locating this the first time I used North Social.
- You may want to add and change the styling for the form so it matches the look of your custom page.
- The default North Social “thank you for signing” up page does not fit within the width of the facebook page so you may want to upload a thank you page or direct people to a thank you message on your website. Click on the Lists and Subscribers tab, click on the name of your list, and then on the right click on Customize Landing pages. Fill out the field ‘Subscribe Confirmation Page’. In my example below, I did not make a thank you page but left it at the default thank you so you can see how it doesn’t fit and why it isn’t a good idea to use it. In this area you can also set up an auto-responder email for people who have signed up. This would be a good place to include a link to a coupon or a free ebook if you are giving away something to all subscribers.
- Here is a very bare-bones example of a contact form on a Facebook tab using North Social.
If you already use a newsletter service like Constant Contact or MailChimp, you are better off using their subscription forms. But, if you are looking for a free and minimal contact form solution, North Contact might be a good solution.
photo credit: shironekoeuro


Never heard about Noth Contact before…Thank you for this tips,I have find it very useful..I’m still a newbie about facebook page code
Whew! the only thing I know about this north contact. The only thing I know is the conventional click of likes and comment and add as friend. Now there is timeline and this so called north contact.